
Avaya Contact Center Select Business Continuity with Avaya IPO 9.1 – Part 1

Avaya ACCS with IP Ofice
Business Contunuity
Note:
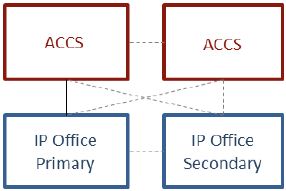 |
| Avaya AACS Resilience |
 |
| AACS Diagram |
Configure ACCS Active
The next you need to launch your Server Configure tool and follow the below screenshots.
- Add General Information including server IP address
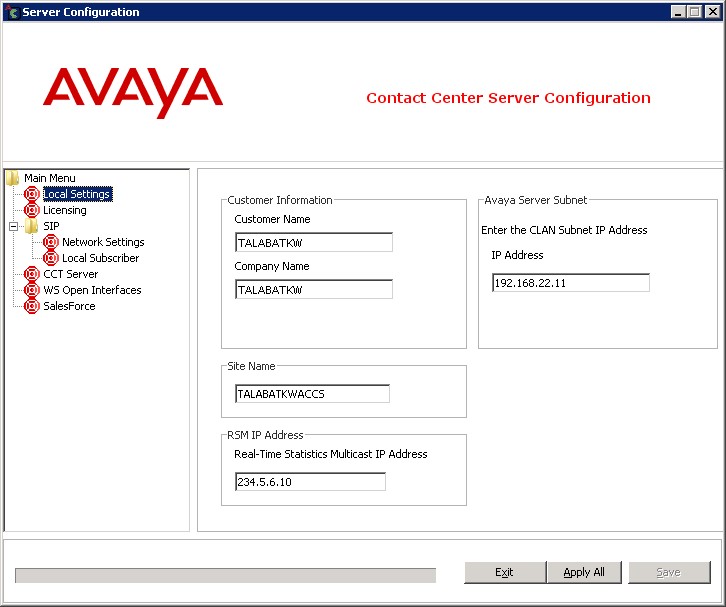 |
| Avaya Contact center select Configuration |
- Pick your License Package
 |
| Avaya Contact center select Configuration |
- In this section you need to add your IP Office information. IP Office Primary Server IP address and IF you have secondary IP office you need to check “Use IP Office Resilience”

- Enter your SIP Doamin name and Port number .Enter your Primary IP office and Secondary SIP extension. Enter the password e.g: 12345678
- Note: Primary & Secondary SIP extension should be different

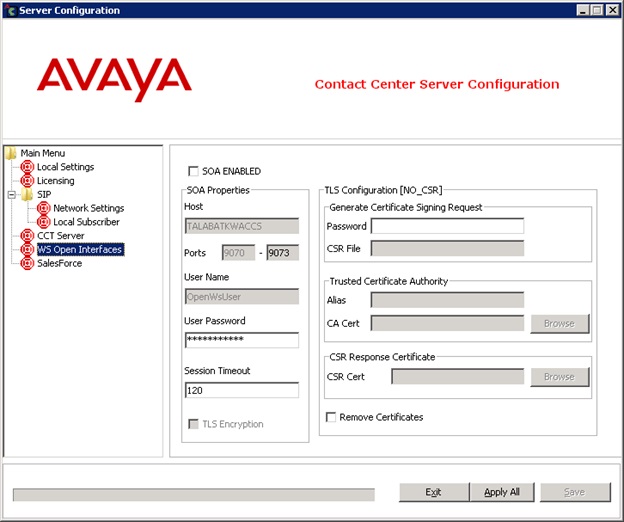
- Since its a co resident server, we can leave this as default

- If you are planning to use AACS web services then you need to configure SOA Enabled.
Configure Primary IP Office
So before we move into Secondary ACCS, lets go and configure our Primary IP Office.
- First we will configure our LAN IP address, which we used about in ACCS Network Settings
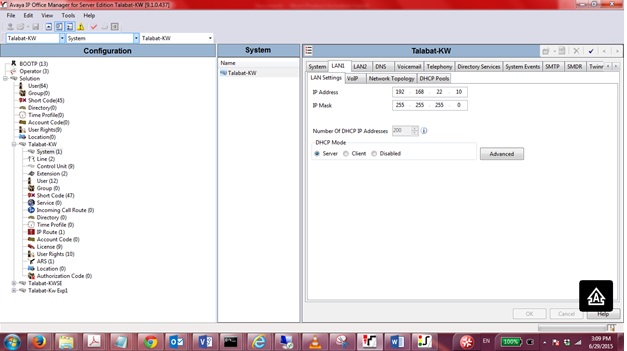
- Then Click on VOIP Tab. and make sure you have configure as below
- SIP Trunk Enable
- SIP Register Enable
- Domain Name (Make sure, your Domain Name Should Match with AACS Domain name)
- Select UDP and TCP ports

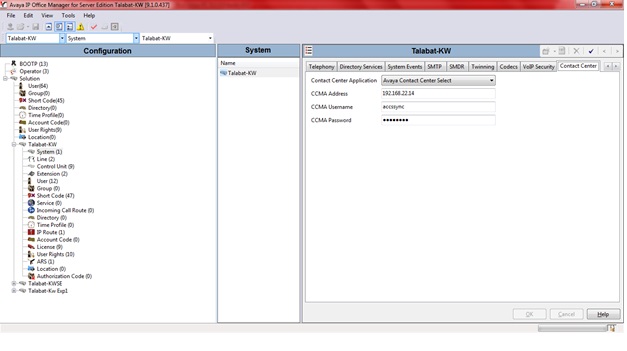
- Once you are done with Domain and SIP configuration. In the same interface TAB go all the to end till you reach “Contact Center” Tab.
- In Contact Center Application “Avaya Contact Center Select”
- Enter AACS Managed IP (We are simulating ressilience enviroment, i’ll show you later where ti configure Managed IP) if you have single AACS you can enter AACS main IP.
- enter following username and password “accssync” (For user data synchronization, IP Office connects to Avaya Contact Center Select using the Contact Center Manager Administration “accssync” user account details.)
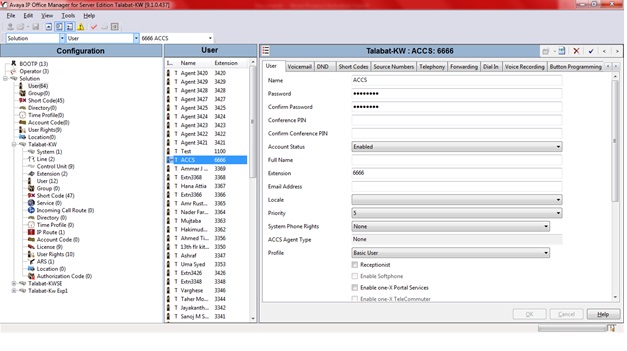
Now lets move on and we will configure SIP extension number which i showed in above ACCS configuration
- As you can see we have configure 6666 extension number in our primary IP Office and password.
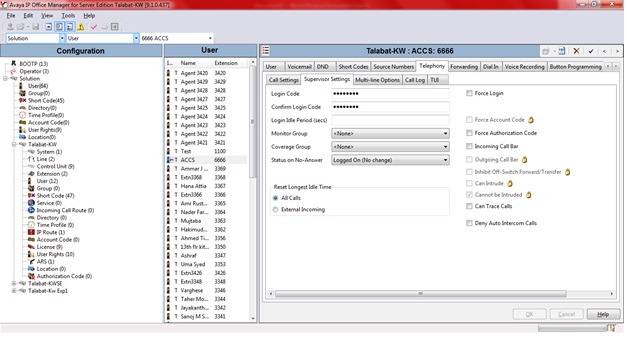
Then clikc on “Telephony” Tab and click on Supervisor and enter the following password “12345678”
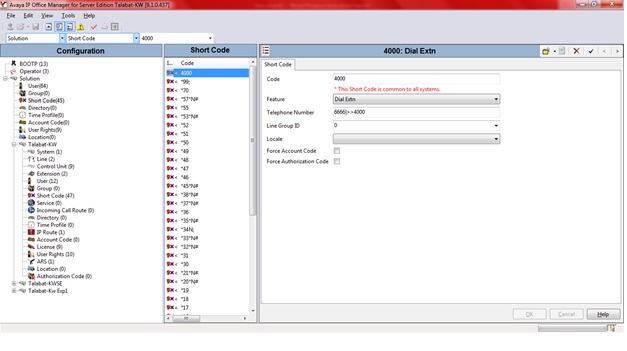
Now we will create Short code in our Primary IP Office to Map real number to CDN number which is configured in ACCS.
For example below:
if someone dials 6666 the call will be routed to 4000 CDN number, and from there ACCS will treat the calls according to call script.
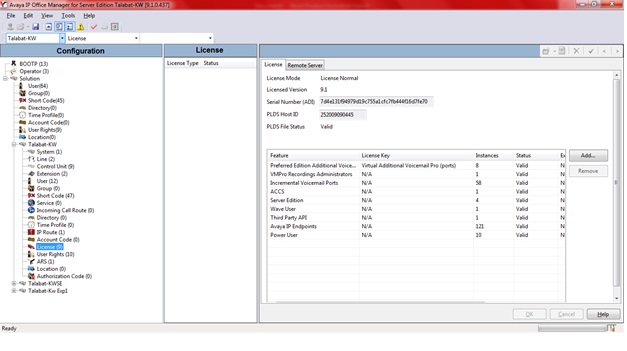
Last make sure you have ACCS and Thirdparty license available in IP Office Primary and Secondary
We will continue our article in next part in which i’ll demonstrate the secondary server configuration


Hi
Can you clarify on the licensing part for the ACCS Standby Server. My setup is RGN without IPO resilience. Thanking you in advance
Avaya Contact Center Select Business Continuity
Business Continuity is an Avaya Contact Center Select (ACCS) licensed feature. ACCS solutions
that support Business Continuity have two ACCS servers. One server, called the active server,
processes customer contacts. The other ACCS server (standby or Remote Geographic Node)
shadows the active server. If the active server fails, the other ACCS server can take over contact
processing. This feature therefore provides ACCS redundancy, data resiliency, and disaster
recovery.